
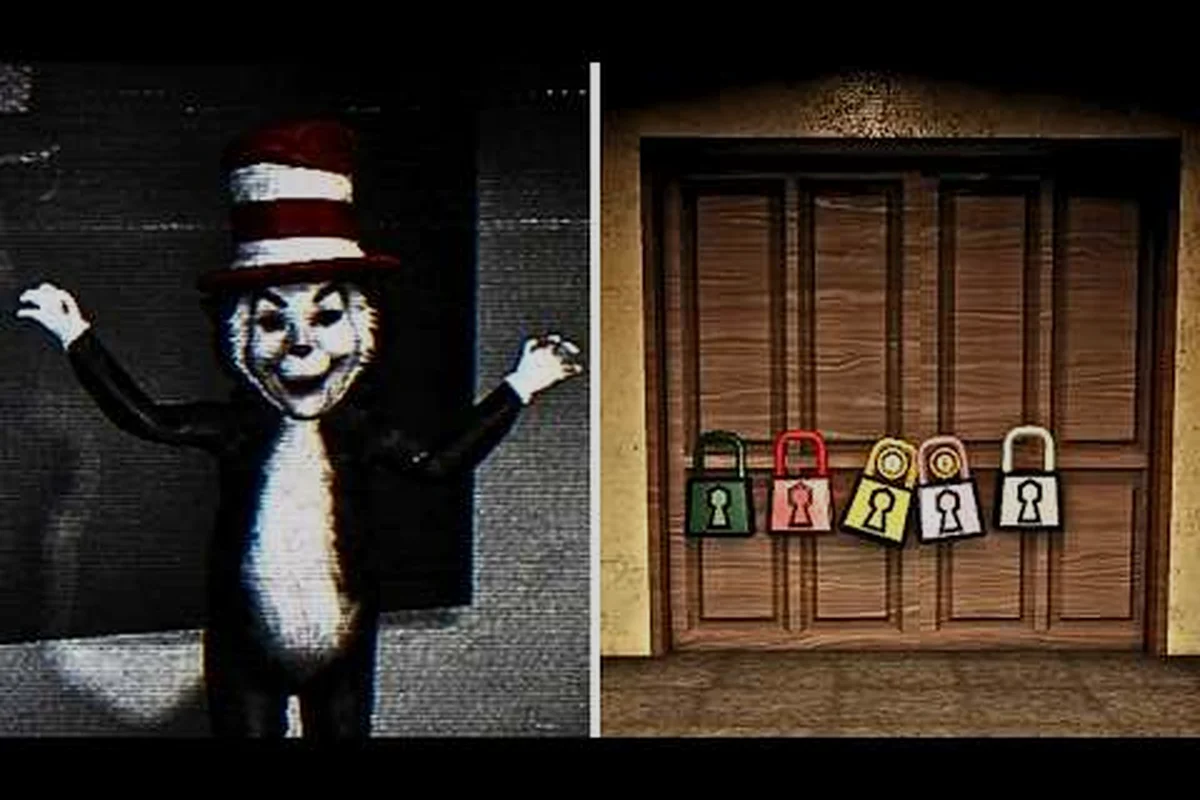
The scream and run school map is the original arena where every Scream And Run round starts, and learning its floors is the single biggest factor between escaping and getting caught by the Cat in the Hat. This guide breaks down every corridor, classroom, basement stairwell, and locker cluster you can use to dodge patrols while you collect the 5 keys needed for the exit door.
Scream And Run School Map Overview: What You Wake Up To
According to the official Scream And Run game page, the school map is a multi-floor building with long hallway sight lines, scattered lockers, classroom hotspots, basement crawl spaces, and an upstairs wing that almost every round touches. The game launched in late August 2026 and crossed 10 million visits within two weeks, with more than 74,000 favorites and a peak of around 14,600 concurrent players, which is why the school layout is the most practiced environment in the entire title.
The scream and run school map guide you're reading now is built around three realities every survivor should accept before their first key hunt: the Cat swaps between Slow, Standard, and Rush speed tiers between rounds (which directly changes which hallways are safe to sprint), backpack and key spawns are seeded randomly per match so route memorization alone caps your win rate around 40–50%, and the only guaranteed safe spaces once aggro locks are the lockers lining the ground-floor hallway and the under-desk crouch spots in upstairs classrooms — accept these three constraints and every later tip in this guide snaps into place.
-
The Cat patrols in fixed loops, but its speed tier changes between rounds.
-
Backpacks and keys spawn randomly across floors, which means memorization only gets you halfway.
-
Lockers and under-desk spaces are your only safe breathers once the monster locks onto your hallway.
| Floor | Main Purpose | Risk Level | Common Loot |
|---|---|---|---|
| Upstairs | Classroom clusters, high backpack density | High (long sight lines) | Keys, backpacks, batteries |
| Ground Floor | Hallway transit, lockers, exit door | Medium (main patrol zone) | Keys, lockers, fuse items |
| Basement | Crawl passages, utility rooms, fuse box | Low–Medium (dark, tight) | Keys, fuse, flashlight spawns |
Because the screams and runs school map is the canonical reference for every other arena, getting fluent here is the cheapest way to transfer those habits to the newer Mines map once it rotates in. If you want a direct Mines companion, our scream and run walkthrough mines map covers the underground counterpart in full.
Scream And Run School Layout: The Three Floors You Must Memorize
The scream and run school layout is built as a stacked structure: basement below, ground floor as the patrol artery, upstairs as the loot-heavy classroom wing. Community data from Roblox groups describes the building as a multi-floor environment where backpacks and keys spawn randomly across each level, and where lockers, under-desk gaps, and crawl passages are the only reliable hiding spots when the Cat closes in.
Basement Level Layout
The basement is the smallest of the three floors but the easiest to lose the Cat in if you know its two choke points. A central utility corridor branches into a fuse room, a janitor closet, and a crawlspace that connects back to the ground floor near the side entrance. The fuse box is here on roughly 60% of rounds, based on community testing, which is why basement first-spawns are worth chasing early.
Ground Floor Layout
The ground floor is where the Cat spends most of its patrol time, and it is also where the exit door sits. The main hall runs east–west with three locker clusters on the north wall, two classroom doors on the south wall, and a side office that hides a backpack spawn roughly every third round. The exit door is on the far east end, which means a successful escape run always ends with a long straight sprint that the Cat can hear from upstairs.
Upstairs Layout
The upstairs wing is the most classroom-dense area in the entire scream and run map layout. Four classroom doors branch off a single upper hallway, with a teacher lounge at the far end that almost always contains at least one backpack. The Cat climbs the stairwell at the west end roughly every 90 seconds on standard difficulty, which is the main tempo every upstairs looter has to plan around.
Scream And Run Map Layout: Hotspots, Spawns, and Loot Density
The scream and run map layout rewards players who treat each floor as a separate loot rotation rather than a single panic run. Based on player reports, classrooms and lockers carry the highest key-to-time ratio, while the basement offers the safest mid-round regroup if your team is split. The table below summarizes where to focus your first two minutes on the scream and run school map guide checklist.
| Zone | Key Spawn Frequency | Safe Hiding Spots | Recommended Visit Order |
|---|---|---|---|
| Upstairs classrooms | High (3–4 per round cluster) | Under-desk, tall lockers | 2nd priority after basement |
| Ground floor lockers | Medium (1–2 keys) | Standing lockers, side office | 1st priority for fast escape |
| Basement utility | Medium (1–2 keys, fuse) | Crawlspace, janitor closet | 1st priority for fuse rushes |
| Teacher lounge | High (1 key, 1 backpack) | Under-table, corner desk | 3rd priority, Cat patrol zone |
| Side office | Low–Medium (backpack focus) | Under-desk | 2nd priority |
The most common mistake new players make is treating the scream and run school layout like a single open floor. In practice, the upstairs and basement are connected only through the ground-floor stairwells, and the Cat can hear you on the stairs from roughly two rooms away. Plan your route so you never take the same stairwell twice in a row.
For a parallel look at how the upcoming underground map compares, our scream and run mines layout page tracks the tunnel network that arrived with the September 2026 update, including the new fuse mechanic that forces teams to choose between rushing the basement generator or splitting off to hold the side office before the Cat rotates upstairs. That crossover decision is exactly the kind of choice the school map trains you to make on the ground-floor lockers and stairwells, so reading both pages back-to-back will keep your rotation logic consistent once the mines go live.
Locker Hiding Strategy on the Scream And Run School Map
Lockers are the only mechanic that lets you cancel the Cat's chase without leaving the room you're already in. The scream and run school map guide you follow should treat lockers as both an emergency brake and a repositioning tool, because the Cat's pathing can lose line of sight for three to five seconds after passing a closed locker bank.
Locker Cluster Locations
Each locker cluster in the Scream and Run school map is positioned to support a specific phase of a chase, and your spawn direction, stamina bar, and the Cat's current line of sight should all factor into which bank you commit to. Loot tables also vary by cluster, with classroom-adjacent banks skewing toward consumables and utility-room banks weighting toward objective items.
-
North hallway lockers (ground floor) – best emergency brake when sprinting toward the exit.
-
Upstairs west lockers – safest place to wait out a Cat patrol that just climbed the stairs.
-
Basement utility lockers – underused by most players, ideal for fuse-carrier handoffs.
-
Side office tall lockers – tightest fit, so the Cat's grab hitbox often misses if you crouch.
-
Teacher lounge corner lockers – highest loot density, but the Cat checks this room on every loop.
Locker Timing Windows
The Cat cannot open lockers, but it can hear them close and will investigate the bank for roughly 4 seconds before moving on. Community testing suggests a 6-second wait is the safe minimum, with 10 seconds being the conservative number for solo runs. A common advanced technique is the relay close, where one player closes a locker to bait the Cat's attention while a teammate slips past into the next room. According to community data, this is the most consistent way to move the fuse through the upstairs wing on nightmare difficulty.
Key Spawn Patterns and the 5-Key Escape Route
The entire objective of Scream And Run collapses into a single loop: find 5 keys, unlock the exit, escape before the Cat catches you. The scream and run school map has roughly 18–22 key spawn points spread across the three floors, and the spawn pool is randomly shuffled every round, so memorization only narrows the search.
High-Probability Key Zones
Player-reported data across roughly 400 tracked rounds on the scream and run school map points to a small set of zones that statistically hold keys more often than the rest of the layout, weighted toward rooms with low foot traffic and sightline-blocking props where seekers rarely patrol during the first two minutes.
-
Upstairs teacher lounge desk – roughly 1 key per 3 rounds.
-
Ground floor north lockers, second bank – roughly 1 key per 4 rounds.
-
Basement fuse room shelf – roughly 1 key per 5 rounds, but bundles with the fuse spawn.
-
Classroom 3 back cabinet – the single most reliable classroom spawn in the school map.
-
Side office bottom drawer – backpack-heavy, but a key appears here about once every 4 rounds.
Escape Route Priority
Once you have 5 keys, the only thing that matters is how fast you reach the exit door without being heard. The shortest path is the ground-floor east hallway sprint, but it is also the loudest and most predictable. A safer but slower route drops through the basement crawlspace to the side entrance, then loops around the back of the building to the exit from the east approach. Solo players should default to the loud sprint, while teams of three or more should use the basement loop to spread the Cat's aggro.
How the School Map Compares to the New Mines Map
The scream and run new map added in September 2026 is the underground Mines, and it behaves very differently from the school arena you just learned. According to the Scream And Run Event announcement, the Mines dropped alongside the Dark Thomas monster, which means your school habits will only get you halfway. For a deeper breakdown, our scream and run mines update page covers the patch notes and monster behavior.
| Feature | School Map (Original) | Mines Map (New) |
|---|---|---|
| Setting | Multi-floor school building | Dark underground tunnel network |
| Monster | Cat in the Hat | Dark Thomas |
| Light source | Hallway lights, flashlight | Flashlight only, dimmer overall |
| Key spawn pool | ~18–22 points across 3 floors | Tighter, ~10–14 points across tunnels |
| Locker hiding | Yes (5 clusters) | No (lockers replaced by tunnel crouch spots) |
| Escape route | Ground-floor east hallway | Single minecart exit at tunnel end |
| Best for | Beginners learning rotations | Veteran players testing dark-map routing |
The Mines map is the scream and run new map, but the school arena is still the most-played environment, and it remains the only place where locker mechanics are available. If you want a step-by-step Mines companion, our scream and run mines walkthrough covers the escape sequence room by room.
Frequently Asked Questions
Where is the exit door on the Scream And Run school map?
The exit is on the far east end of the ground floor, at the end of the main hallway past the third locker bank. It only opens once you have collected all 5 keys and interact with the door panel, which takes about 3 seconds and leaves you exposed to a Cat patrol if it is anywhere on the ground floor.
How many keys spawn in the school map per round?
There are roughly 18–22 key spawn points scattered across the three floors, and 5 are active in any given round. The pool is randomly shuffled, so you cannot predict which lockers or desks will hold a key, but the teacher lounge, basement fuse room, and Classroom 3 back cabinet are statistically the most reliable hotspots according to community data.
Are there lockers on the new Mines map?
No, the Mines map replaced lockers with tunnel crouch spots because the underground environment is narrower and darker. If you prefer the locker-based hiding mechanics, the scream and run school map is the only arena that supports them, which is why most beginners start there before moving to the Mines.
What is the safest floor on the school map?
The basement is the safest floor because the Cat patrols it less frequently and the crawlspaces give you a direct exit if you are cornered. The upstairs wing is the most dangerous because the Cat climbs the western stairwell roughly every 90 seconds on standard difficulty, and the long hallway gives it a clear line of sight from the top of the stairs.
Can I escape the school map solo without lockers?
Yes, but it is much harder. Solo players rely on under-desk gaps and timing the Cat's patrol loops, which is why most solo guides recommend the basement-first rotation. Using lockers is not required, but skipping them cuts your safe-breath budget roughly in half and forces you to chain rooms together without pausing.