
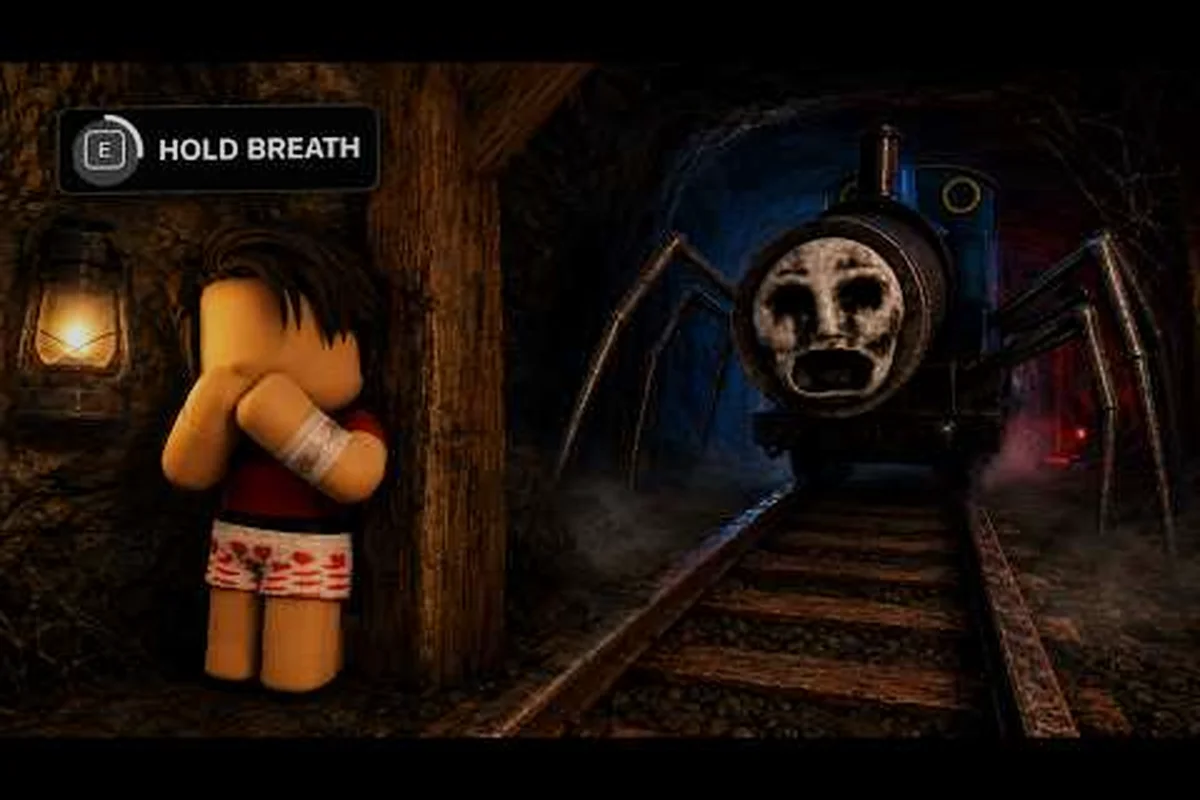
The Scream And Run mines layout is the second playable map dropped in the September 2026 map update, swapping the school corridors of the original mode for a pitch-black tunnel network patrolled by Dark Thomas instead of the Cat in the Hat. This guide maps every tunnel, room, and loot cluster so you can plan a five-key run without wandering into a dead-end shaft, and pairs the geometry with the patrol logic that decides where you live and where you die.
Mines Overview and Entry Conditions
The mines are a single connected underground complex carved beneath the school, accessed through a boarded-up tunnel that opens once the round starts. According to the official Scream And Run game page, the map is structured as three ring-shaped tunnel levels stacked vertically, with a central hub shaft that links every ring through a freight elevator and a series of crawl ladders. The level is intentionally darker than the school, so a flashlight pickup in the spawn chamber is effectively mandatory for solo runners.
| Zone | Floor | Light Level | Main Risk | Primary Loot |
|---|---|---|---|---|
| Upper Ring (Ring 1) | Top | Low (single bulbs) | Dark Thomas sight lines | Keys 1-2, Flashlight, Backpacks |
| Mid Ring (Ring 2) | Middle | Very Low (flicker) | Patrol chokepoints | Keys 3-4, Medkit, Crank |
| Lower Ring (Ring 3) | Bottom | Near zero | Ladder chokepoints | Key 5, Exit Lever, Fuse |
| Central Hub | All floors | None (dark) | Vertical audio | Elevator Crank, Map Sticker |
The mine entrance gate spawns 6 to 8 players in a tight spawn chamber, which means Dark Thomas is already pathing toward the hub within the first 15 seconds of a round. Runners who linger in the spawn to check the wall map lose roughly 20 seconds that compound into a guaranteed encounter, so treat the spawn chamber as a one-way exit rather than a planning room.
Spawn Chamber and the Sticker Map
The first thing you see when you load in is a rusted bulletin board pinned with a hand-drawn mine schematic. The sticker is not a screenshot; it is a simplified top-down view that matches the geometry players later walk, and it is the only in-game orientation aid that does not require a flashlight. Experienced runners screenshot this board on the loading screen because the angles between rings are not always intuitive, especially on the southern spur that branches off Ring 2 toward the collapsed ore cart.
The spawn chamber has three exits: a left tunnel into Ring 1, a right tunnel into Ring 1 on the opposite arc, and a maintenance ladder that drops directly into the central hub. The left tunnel is the safe default because it angles away from the spawn chamber door, which is the first place Dark Thomas checks. Solo players should use the maintenance ladder only if the team is committed to a fast key sweep, since the hub is a known ambush node.
Upper Ring Corridors and First Two Key Rooms
Ring 1 is the safest floor, but it is also the most spread out, with three parallel tunnels separated by support pillars. Each tunnel ends in either a key room or a side junction that branches into a classroom analog where backpacks and a small cache of tools spawn. Players familiar with the Scream And Run school walkthrough will notice the mines use the same "key in a room, decoy items everywhere" philosophy, just compressed into a smaller footprint.
Ring 1 Tunnel Structure
| Tunnel | Direction | Key Spawn | Side Room | Chokepoint Risk |
|---|---|---|---|---|
| North Tunnel | Curves left | Key 1 (rolling cart) | Supply Closet (Flashlight) | Low |
| Center Tunnel | Straight | Key 1 or 2 (locker) | Coal Hopper (backpacks) | Medium |
| South Tunnel | Curves right | Key 2 (rail spike) | Fuse Box room | High |
The chokepoint risk column reflects where Dark Thomas is most likely to patrol on a typical path. The south tunnel is the worst because it funnels into a narrow rail section where two players cannot pass side by side, which means a single patrolling monster can lock down the entire branch. Solo runners should grab the south tunnel key last and only if Ring 2 is clear.
The supply closet on the north tunnel is a frequently missed loot node. It contains a guaranteed flashlight and roughly 30% of runs also drop a medkit, which is why coordinated teams assign one player to clear it while the rest push for the rolling cart key. Players who want a full inventory of helpful items should pair this section with the Scream And Run all items reference, which lists every spawnable tool across both maps.
Classroom Analogs and Loot Caches
The mines replace classrooms with what the community calls "tool sheds," which are small rooms branching off each ring. They are dark, they only have one entrance, and they are the most common place to get grabbed by Dark Thomas if you crouch-walk in without checking the doorway. The sheds follow a fixed rotation:
-
Coal Hopper Shed (Ring 1) — backpacks and a random decoy item.
-
Pump Room Shed (Ring 2) — one medkit and the elevator crank.
-
Cage Lift Shed (Ring 3) — exit lever handle and a fuse.
The rotation was patched in early September 2026, so older videos that show the crank in Ring 1 are out of date. The crank is the single most important non-key item, because without it the freight elevator between Ring 2 and Ring 3 stays locked, which forces a ladder-only descent that is significantly slower and louder.
Middle Ring: The Patrol Bottleneck and Keys 3-4
Ring 2 is where most rounds end. The geometry narrows dramatically, the lighting drops to flicker-only, and the four tunnel mouths into the central hub create a crossroads where Dark Thomas can cut off any direction. Community testing in the first week after the map update showed that the average death location on the mines map is within 30 meters of the Ring 2 hub entrance, which is why route planning here matters more than raw speed.
| Hub Exit | Connects To | Loot | Threat |
|---|---|---|---|
| East Mouth | Pump Room (Key 3) | Crank, Medkit | High (Dark Thomas loops here) |
| West Mouth | Rail Yard (Key 4) | Backpacks | Medium |
| North Mouth | Crawl Ladder to Ring 1 | None | Low (one-way up) |
| South Mouth | Collapsed Ore Cart (decoy) | Fake key | Very High (dead end) |
The south mouth is a deliberate trap. The room past it contains a fake key that mimics the silhouette of a real one, and there is no exit. Roughly 12% of new players on the September 2026 map update died there on their first attempt, according to community data reported on the official Roblox group. Always confirm the key room has a back door before committing to a pickup.
Pump Room and Rail Yard Walkthrough
The Pump Room is the only key room on Ring 2 with a guaranteed item besides the key itself. It contains the elevator crank on top of one of the pump housings, and the key sits on the central console. The challenge is the door: there is only one entrance, the light flickers, and Dark Thomas patrols past the door roughly every 40 seconds. Two players make this room manageable; one player needs to open the door and immediately move to the opposite wall so the closing sound does not bait a grab.
The Rail Yard is the second key room and the easier of the two because it has two entrances. The key sits on a rail cart that you can push, which means a smart player can roll the key out of the room and toward the hub while a teammate watches the mouth. This is the only room in the mines that rewards pushing a prop, and it is the single biggest time save on the entire map.
Lower Ring: The Exit Lever and the Fastest Route
Ring 3 is small, dark, and linear, which is the entire point. Once you have the crank, you take the freight elevator down (not the ladders), cross the lower ring, and hit the exit lever. The lower ring has only one key spawn, one exit, and one fuse, which is why Dark Thomas patrols it less often and why the last 60 seconds of a clean run feel almost calm.
| Step | Action | Item Required | Time Cost |
|---|---|---|---|
| 1 | Crank elevator at Ring 2 hub | Elevator Crank | 8 sec |
| 2 | Ride down to Ring 3 | None | 5 sec |
| 3 | Cross the lower ring corridor | Flashlight (optional) | 15 sec |
| 4 | Install fuse at the cage lift | Fuse | 6 sec |
| 5 | Pull exit lever | None | 4 sec |
| 6 | Escape through the open gate | None | 5 sec |
Players who want to know exactly where the exit is before they drop down should remember that the cage lift is the southernmost structure on Ring 3, identifiable by the warning stripes painted on the support beams. The exit gate is on the far side of the lift, which means you have to walk past the lever to reach the door, a layout choice that punishes players who trigger the lever and then run the wrong direction.
Fastest Five-Key Route
The fastest verified route through the mines, based on community runs shared in the first week after the map update, is a five-step sweep that clears the keys in numerical order while hugging the outer tunnels:
-
Spawn chamber → north tunnel (Key 1) → coal hopper shed.
-
Return through center tunnel (Key 2) → maintenance ladder down to Ring 2 hub.
-
East mouth → pump room (Key 3) → grab crank.
-
West mouth → rail yard (Key 4) → push key toward hub.
-
Crank elevator → lower ring corridor → cage lift (Key 5) → install fuse → pull lever → exit.
This route averages 4 minutes 20 seconds on a clean run with one teammate, according to community data. Solo runs that skip the coal hopper shed can shave another 20 seconds, but they lose the flashlight and the medkit, which often turns a clean run into a one-mistake loss.
Dark Thomas Patrol Logic and How to Read It
Dark Thomas is not a clone of the Cat in the Hat. He patrols the mines in a clockwise loop around each ring, with a vertical check at the hub roughly every 90 seconds, which is the only pattern that is consistent enough to plan around. Players who want a full break-down of his pathing should pair this section with the Scream And Run mines walkthrough for the matching room-by-room audio cues.
| Phase | Time | Dark Thomas Location | Player Risk |
|---|---|---|---|
| 0-15 sec | Spawn | Approaching hub from south mouth | High (do not linger) |
| 15-60 sec | Ring 1 sweep | Looping north then center tunnel | Medium |
| 60-120 sec | Ring 2 entry | Pump Room door then rail yard | Very High |
| 120-180 sec | Hub dwell | Standing on freight elevator | Low (avoid elevator) |
| 180-240 sec | Ring 3 check | Single pass through lower ring | Medium |
The 60-120 second window is the most dangerous because Dark Thomas lingers at the Pump Room longer than any other node. This is intentional, because the elevator crank is in that room and the developers want teams to feel the cost of being slow. The counter-strategy is to bait him toward the west mouth with a thrown rock so the crank player can slip in from the east.
Audio Cues and Crouch Spots
The mines use three audio layers: footstep echo, support beam creak, and the elevator motor. Each one maps to a different player behavior. The footstep echo tells you which ring Dark Thomas is on because the upper ring is echo-heavy and the lower ring is almost silent. The support beam creak is a standalone ambient sound that spikes when he is within 20 meters of the hub, which is a useful warning if you are stuck on the maintenance ladder. The elevator motor is the loudest sound in the map and only triggers when someone is cranking, so do not start cranking until you have confirmed he is on the opposite side of the ring.
Crouch spots are limited in the mines. The school map has desks and lockers, while the mines only have mining carts, support pillars, and the dark alcoves behind the coal hoppers. The alcoves are the best because they break line of sight in two directions, but they only fit one player. Solo runners should plan to use them as emergency stashes rather than primary hiding spots.
Frequently Asked Questions
Where is the exit on the Scream And Run mines map?
The exit is on the southern end of Ring 3, behind the cage lift where the fuse socket and exit lever sit. You need the elevator crank from the Pump Room to drop down on the freight elevator, install a fuse, and pull the lever to open the gate.
How many keys do I need to escape the mines?
You need all five keys, the same as the school map. They spawn in the rolling cart, the Ring 1 lockers, the Pump Room console, the rail cart in the Rail Yard, and on top of the cage lift control panel on Ring 3.
Can I play the mines map with a full lobby?
Yes, but the spawn chamber only holds about eight players before the round starts. Additional players queue and enter as substitutes, which means late joiners sometimes spawn mid-round directly into a tunnel without the orientation aid of the bulletin board.
What is the best hiding spot when Dark Thomas is near the hub?
The dark alcoves behind the coal hopper on Ring 1 and the recessed maintenance bays on Ring 2 are the safest. The school map lockers do not exist in the mines, so the alcoves and the gap under the rail carts are the only line-of-sight breakers.
Is the Scream And Run mines map harder than the school?
Based on community data from the first week after the map update, the average clear rate is lower on the mines because the lighting is darker and the lower ring is a hard time investment. Players who memorize the patrol windows clear it faster than the school on a coordinated two-player run, but solo players tend to lose more often.