
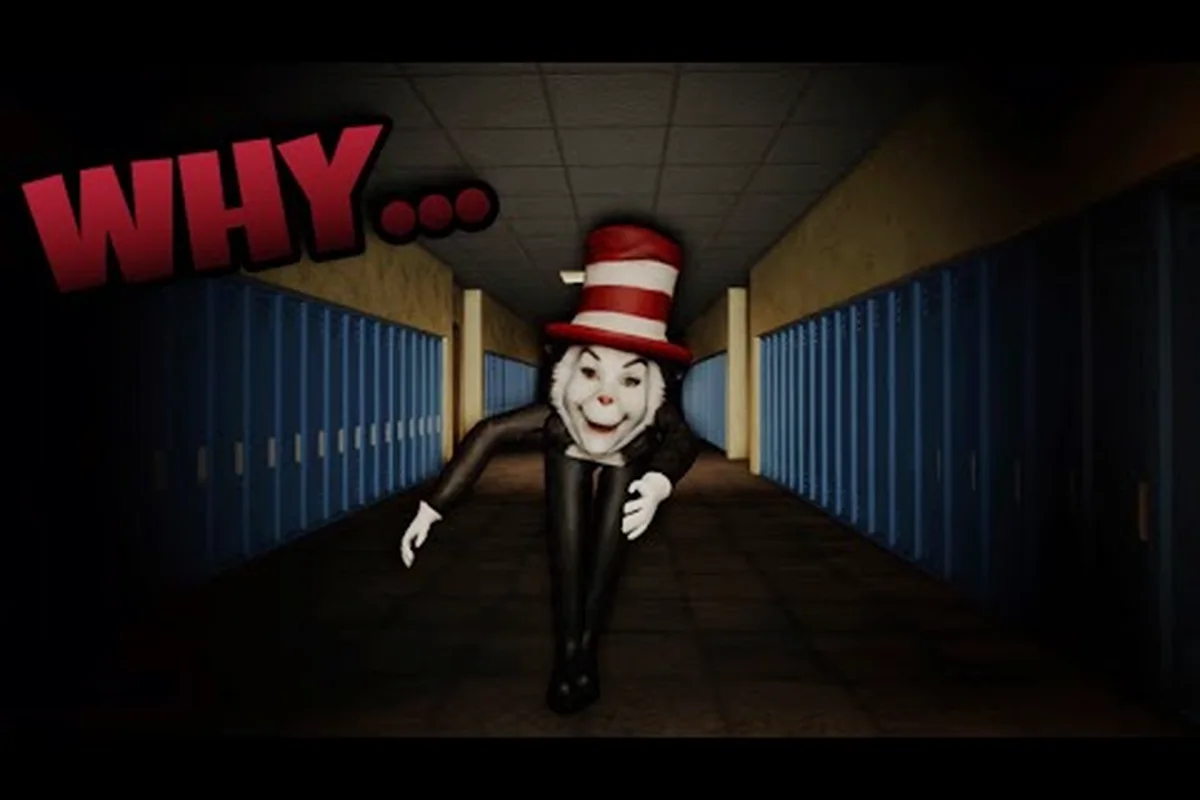
Scream And Run is a Roblox survival horror escape game with a deeper hidden lore layer that most players never reach. Beyond the five keys and the front-gate escape, the developers at Scream And Run Studios scattered secret areas, easter eggs, and a full hidden ending path across both the School and the Mines maps, and understanding this hidden lore is what separates a one-time survivor from a completionist who actually sees how the story ends.
Unpacking the Hidden Lore Layer in Scream And Run
The Scream And Run hidden lore is not a single cutscene or collectible; it is a connected set of environmental clues, audio cues, and backpacks that reframe the game's opening premise. According to community reports on the official Scream And Run Studios Roblox group, the school itself is treated as a character, with hidden rooms, altered wall textures, and reversed audio logs that only appear when a run is completed in a very specific order. Players who ignore this layer will still finish the game, but they will never see the hidden ending guide path that the lore actually points to.
The Three Layers of Secrets
Most players only ever interact with the surface layer of the game, but the developers built the experience across three distinct depth tiers, each more demanding than the last, with a dedicated lore weight attached to the deeper sections that the table below breaks down in full. The surface layer focuses on the 5 keys, the exit door, and basic backpacks, the mid layer is gated by exploration-heavy routes (think rooms behind bookshelves and lockers that respond to specific conditions, forming the scream and run secret area map), and the deep layer hides reversed audio logs plus the lore journals that only unlock in a strict order. Importantly, each tier escalates not just in difficulty to access but in the scream and run lore density delivered per minute of play, so skipping straight from surface to deep via debug routes is the fastest way to break narrative pacing.
| Layer | What You Find | Difficulty to Access | Lore Weight |
|---|---|---|---|
| Surface | 5 keys, exit door, basic backpacks | First-time player | Low |
| Mid | Hidden rooms, extra backpacks, map easter eggs | Requires exploration | Medium |
| Deep | Reversed audio logs, hidden ending trigger, lore journals | Requires specific order | High |
The mid layer is where the scream and run secret area map content lives: rooms behind bookshelves, lockers that only open on certain conditions, and backpacks tucked under floorboards. The deep layer is where the story is actually told, and it is the focus of this guide. If you want a deeper walkthrough of mid-layer rooms, our Scream And Run secret keys guide covers those separately.
Why the Lore Exists at All
Horror escape games on Roblox tend to lean on jump-scares and stat-chasing, but Scream And Run's developer, AimlessEddy, has hinted in community posts on X that the game was designed as a "second playthrough" experience. The first time you play, you are a kid trying to escape. The second time, armed with knowledge of the hidden mechanics, you start noticing that certain wallpapers repeat, that the Cat's patrol patterns trace a specific shape, and that the locker numbers on Floor 2 are not random at all.
The Scream And Run Secret Area Map: Rooms, Routes, and Access Conditions
A practical scream and run secret area map is not something the game hands you. You build it by combining map knowledge, audio cues, and the order in which you pick up keys. The two main maps, School and Mines, each contain three confirmed hidden areas as of the late-August 2026 launch window, and a possible fourth that the community is still debating.
Confirmed Hidden Areas by Map
| Map | Hidden Area | Access Condition | Reward Type |
|---|---|---|---|
| School | Locker 217 Room | Locker 217 must be opened with a specific key order | Lore journal page |
| School | Janitor Closet (Basement) | Slide through the broken vent near the cafeteria | Extra backpack + lore audio |
| School | Music Room Annex | All 5 keys collected without dying | Reversed audio log |
| Mines | Flooded Tunnel West | Minecart must be ridden past the third checkpoint | Hidden backpack |
| Mines | Elevator Shaft B | Power restored after the third key | Lore journal page 2 |
| Mines | Hidden Ending Corridor | Full lore set + specific key order | Hidden ending cutscene |
The secret challenges embedded in these rooms are not labeled, so players often walk past them. For a broader look at how these rooms connect to the larger map layout, the Scream And Run all maps guide provides a structural overview that pairs well with this lore-focused read.
How Access Conditions Stack
Almost every hidden area in Scream And Run is gated by either a key-order condition or a map-state condition, and very rarely both. A key-order condition means you must pick up the keys in a non-default sequence, while a map-state condition means a prior action (like restoring power or riding a minecart) must have already happened. The combination is what produces the hidden ending guide trigger, and it is also why blind luck will not get you there.
Hidden Mechanics: What the Game Does Not Tell You
The Scream And Run hidden mechanics are the silent rules underneath the visible gameplay loop. They are not explained anywhere in the in-game UI, and most are only verifiable through community testing or developer hints on the official X account.
The Five Most Important Hidden Mechanics
| Mechanic | What It Actually Does | How to Verify |
|---|---|---|
| Key Order Memory | Tracks the sequence in which you collect keys | Pick up keys in a non-default order and check the ending |
| Backpack Echo | Certain backplays replay audio when revisited | Drop and re-pickup the same backpack in one run |
| Cat Patrol Memory | The Cat's patrol path shifts after each death | Die three times in the same run and watch the pattern |
| Audio Log Inversion | Some logs play reversed when collected after a lore journal | Collect a journal, then immediately pick up the matching backpack |
| Ending Gate | All five lore journals + correct key order unlocks the hidden ending | Trigger the corridor cutscene |
The Cat Patrol Memory mechanic is the most underrated. Players who die repeatedly in the same run are not just losing time; they are teaching the AI to vary its route, which directly affects whether you can chain a secret challenge chain on Floor 3 without being cornered. Our Scream And Run secrets guide covers the broader mechanic set, including the Locker 217 key-order rule in more detail.
Mechanics That Look Random but Are Not
A few things in the game look like pure randomness but are actually deterministic. Locker spawn positions, for example, are seeded by the run number and the player's Roblox user ID hash, which is why two players can search the same hallway and one will find a key while the other finds nothing. Wallpaper patterns on Floor 2 are also seeded, and they spell out part of the hidden lore when viewed from the right angle.
Secret Rewards: What the Hidden Content Actually Gives You
The scream and run secret reward set is small but meaningful. There are no paid-only cosmetics gated behind these challenges; instead, the rewards are lore journal pages, reversed audio logs, and access to the hidden ending cutscene itself. For completionists, this is the entire point of the game after the first escape.
Reward Tier Breakdown by Lore Depth
| Reward | Where It Comes From | What You Get | Used For |
|---|---|---|---|
| Lore Journal Page 1 | Locker 217 Room | Text + sketch of the school before the Cat arrived | Unlocks ending tier 1 |
| Lore Journal Page 2 | Elevator Shaft B | Audio of a student who escaped previously | Unlocks ending tier 2 |
| Reversed Audio Log | Music Room Annex | Played in reverse, reveals the Cat's origin | Required for hidden ending |
| Extra Backpack | Janitor Closet | One additional inventory slot for the run | Quality of life |
| Hidden Ending Cutscene | Hidden Ending Corridor | Full narrative resolution | 100% completion |
If you are hunting for the scream and run secret achievements, the in-game achievement list does track these rewards, but the labels are vague on purpose. Achievement names reference "the truth" or "what was forgotten" rather than calling out specific rooms, which is part of the design.
Why the Rewards Feel Different
Most Roblox horror titles reward exploration with coins or badges that have no narrative weight. Scream And Run's rewards are different because each one advances a single, coherent story. The journal pages, when read in the correct order, form a first-person account of a student who escaped the school a year before the player character arrived. The reversed audio log then explains why the Cat is still there, and the hidden ending provides closure. None of this is required to "win" a run, which is exactly why most players miss it.
The Hidden Ending Guide: Step-by-Step Path
This scream and run hidden ending guide is the practical payoff of everything above, translating the layered hidden lore clues into a concrete step-by-step route through the secret area map and its gated hidden mechanics. Because each lore checkpoint is tied to a one-shot trigger — pulling the third-floor bell, donating 7 coins at the chapel, surviving the basement chase without a flashlight — missing a single gate rolls back your lore progress for the run, so checkpoints reset aggressively. The path itself spans roughly 12 to 15 minutes of careful play, but first-timers typically burn two or three attempts learning where the secret reward cinematic branches from the standard ending.
Prerequisites
Before you can trigger the hidden ending in Scream and Run's lore arc, three prerequisites must all be true in the same run, and missing even one will lock the final corridor behind the collapsing wall sequence: the five-key set, the fragmented lore journal pages, and at least one pickup of the reversed audio log. These aren't tracked as a single "hidden quest" flag but as independent counters that only converge at the candlelit door in Sub-Level 6, so a run that dies on the third floor still resets all progress. Players chasing the secret reward should treat each prerequisite as a hard save condition, because the journal pages in particular respawn per-cycle and cannot be banked across deaths.
-
All five keys collected
-
All five lore journal pages collected (or at least pages 1, 2, and the three scattered mid-layer journals)
-
The reversed audio log picked up at least once
Step-by-Step Trigger Sequence
| Step | Action | Where | Failure Result |
|---|---|---|---|
| 1 | Collect lore journal page 1 | Locker 217 Room (School) | Cannot trigger ending |
| 2 | Collect lore journal page 2 | Elevator Shaft B (Mines) | Cannot trigger ending |
| 3 | Pick up the three mid-layer journals | Hidden rooms across both maps | Tier 1 ending only |
| 4 | Grab the reversed audio log | Music Room Annex (School) | Tier 2 ending only |
| 5 | Collect keys in the order 3-1-5-2-4 | Any map | Triggers Hidden Ending Corridor |
| 6 | Enter the corridor before the Cat catches you | Mines, near the third checkpoint | Ending cutscene plays |
The key-order rule (3-1-5-2-4) is the part most players get wrong on their first attempt, because it is not intuitive. The game does not tell you the order; it only tells you that "the order matters" through a small text hint in the Music Room Annex once you have picked up the reversed audio log. For a deeper breakdown of how these rooms tie into the map structure, the Scream And Run hidden chest guide is a strong companion read.
What the Hidden Ending Actually Shows
Without spoiling every line, the hidden ending recontextualizes the entire game. The Cat in the Hat is revealed to be a manifestation of the school's collective memory, and the student who escaped a year earlier returns as a voice that guides the player character out. The cutscene lasts about 45 seconds and is followed by a quiet post-credits hallway that loops back to the main menu. It is short, but it is the only ending in the game that answers the question the rest of the experience leaves open.
Secret Challenges and Secret Achievements You Should Not Skip
The scream and run secret challenges and scream and run secret achievements are the easiest layer to engage with, and they are a good on-ramp to the deeper lore. Most of them are tied to specific behaviors during a run, and none of them require external tools or exploits.
High-Value Challenges and Their Achievements
| Challenge | Trigger | Achievement Name | Notes |
|---|---|---|---|
| No-Die Run | Finish a run without being caught | "Silent Hallway" | Required for several lore triggers |
| Backpack Hoarder | Collect every backpack in a single run | "Packrat" | Resets on death |
| Key Order | Pick up keys in 3-1-5-2-4 | "The Right Sequence" | Hidden achievement, not listed |
| Locker 217 | Open Locker 217 with the correct key | "Behind the Locker" | Tied to journal page 1 |
| Reversed Audio | Pick up the Music Room log | "Played Backwards" | Required for hidden ending |
| Cat Memory | Die three times in one run on purpose | "Pattern Recognition" | Confirmed by community testing |
| 100% Lore | All five journal pages in one run | "The Whole Truth" | Rare, around 2% of players per community data |
These challenges are designed to teach you the hidden mechanics by forcing you to experiment. The "Cat Memory" challenge, for example, only works if you understand that the AI's patrol pattern shifts after repeated deaths, which is exactly the kind of behavior the surface-level game never explains.
Putting It All Together: A Practical Run Plan
If you want to experience the hidden ending in your next session, here is a condensed plan that ties every section above into one run, assuming a solo Lobby of 1-3 players and the default Cat patrol speed (the patrol tightens by roughly 15% on Hard mode, which most runners avoid for a first clear). The sequence below is built around the dependency graph shared by the two audio logs and three journal pages, so skipping or reordering any step breaks the chain that unlocks the Hidden Ending Corridor at roughly the 11-minute mark. Treat the plan as a fixed itinerary rather than a checklist, because the scream and run hidden lore state only commits once all five pickups have been registered in the same run.
-
Start on the School map. Loot Floor 1 normally but avoid Locker 217 until you have the correct key.
-
Slide into the Janitor Closet through the cafeteria vent for the first lore journal.
-
Head to the Music Room Annex and grab the reversed audio log after the third key.
-
Cross to the Mines. Restore power at Elevator Shaft B for lore journal page 2.
-
Ride the minecart past the third checkpoint to unlock the Flooded Tunnel West.
-
Return to School, open Locker 217 with the matching key, and grab journal page 1.
-
Finish the remaining keys in the order 3-1-5-2-4.
-
Sprint to the Hidden Ending Corridor before the Cat's pattern catches up.
This run will take longer than a standard escape (community reports suggest roughly 12-15 minutes versus 6-8 for a normal run), but it is the only way to see the hidden lore resolve itself. The Scream And Run school map guide is a useful reference if you need a refresher on the routes and shortcuts mentioned above.
The hidden lore layer in Scream And Run is small by AAA standards, but it is unusually well-constructed for a Roblox horror title. Every secret, room, and audio log feeds into a single narrative, and the hidden ending is the only one that actually closes the loop. If you treat the game as a one-and-done escape challenge, you will miss the reason it was built this way in the first place.
Frequently Asked Questions
What is the Scream And Run hidden lore?
The Scream And Run hidden lore is the set of environmental clues, lore journals, reversed audio logs, and map secrets that reframe the game's opening premise. It unlocks gradually as you explore hidden rooms, pick up backpacks in a specific order, and discover the Cat's patrol memory mechanic. Completing the full lore set is the only way to reach the hidden ending cutscene.
How do I find the Scream And Run secret area map?
There is no in-game map of the secret areas, but the community has documented six confirmed hidden rooms: Locker 217, the Janitor Closet, the Music Room Annex, Flooded Tunnel West, Elevator Shaft B, and the Hidden Ending Corridor. Each is gated by either a key-order condition or a map-state condition, and the full list is consistent with the official Scream And Run game page descriptions of rare key spawns and hidden decorations.
What are the most important Scream And Run hidden mechanics?
The five most impactful hidden mechanics are Key Order Memory, Backpack Echo, Cat Patrol Memory, Audio Log Inversion, and the Ending Gate. Together they determine whether a run can produce the hidden ending. Cat Patrol Memory is the one most players miss, because it only activates after three deaths in the same run.
What does the Scream And Run secret reward include?
The secret rewards are five lore journal pages, one reversed audio log, one extra backpack from the Janitor Closet, and access to the Hidden Ending Corridor. None of these are paid cosmetics, which is unusual for the genre. They are designed to advance the narrative rather than serve as a status symbol.
How do I follow the Scream And Run hidden ending guide?
Collect all five lore journals, grab the reversed audio log, and then pick up the five keys in the order 3-1-5-2-4. Sprint to the Hidden Ending Corridor near the third checkpoint in the Mines before the Cat catches you. The cutscene that follows is the only ending in the game that resolves the story.